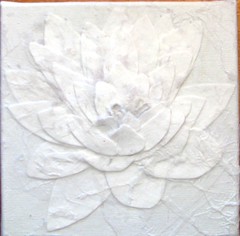
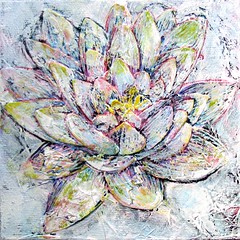
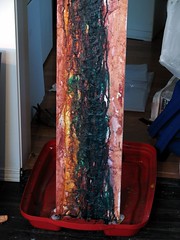
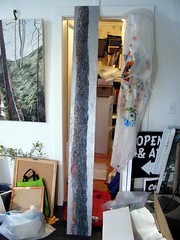
Getting Ready for the One of A Kind Christmas Show

Showing posts with label Manipulated Paper Technique. Show all posts

Sunday, September 29, 2013

Studio Leaks, Speed Videos and the #OOAKX13


It's true. I applied to Toronto's One of A Kind Christmas Show this year and was accepted,  an exceptional achievement as I understand it. Admittedly, I'm little giddy and a lot nervous -- and I expect none of that will change until it is all over -- but thankfully I will get a fair amount of respite buried in deep focus in the studio. 

Lately while working in the studio I've been sharing photos via my iphone (a.k.a. "studio leaks") to Instagram, Facebook, Twitter and Tumblr.  To commemorate my inclusion I've decided to kick this behind-the-scenes-sharing up a notch by recording many of my new works as they progress. I've sped these vids up quite a bit, too, so try not to blink.

But give me a quick sec before I première my first speed video to introduce you to my OOAK Booth Buddy Barb TenEycke. It was Barb who contacted me and asked if I would like to apply to this section with her. As first time OOAK applicants we are able to take advantage of the (one time offer) benefit of booth sharing.  It is a pleasure and a privilege to share the excitement, the ins & outs, and the nitty gritty with her. Barb is a Canadian Landscape painter with a keen eye for colour and a canny ability to capture tranquility. I hope you take a moment to check out more of her works.


And now for my (ahem) ultimate #StudioLeaks on Getting Ready for the #OOAKX13:


If you don't want to miss more of these videos and updates, I recommend subscribing. 
Find the Subscribe box top right, and enter your email 
(which I will never share without your express permission!)


If you get to Toronto Between Nov 28th and Dec 2nd be sure to say Hello.


Friday, April 05, 2013

The Secrets of a Paper Artist

Wrapped in my favorite colours, my course information on Paper Sculpting & Painting on Canvas is now available in print as well as online.

 (The 2013 course catalog is out! And I am so pleased to see that one of my works was featured!)


 Recently, I had been mulling over treaching workshops due to the number of requests I receive, so when an invitation by Haliburton School of the Arts to teach a summer course was extended to me, it seemed kismet.


(click on image to open the course calendar)

This will be the first time I take a group in a class setting on an in depth hands-on journey through the process which sparked my contemporary paper art. I am really looking forward to an immersion in the roots of my technique and excited to see what new interpretations and expressions will come out of it for those who enroll.

Course Description:

How you use paper products in your creative efforts is greatly determined by the properties of paper itself. Work with a variety of papers including rice, silk, watercolour and tracing papers to develop a deeper understanding of their properties through experimentation, sculpting and manipulation while creating structures for paint and ink exploration. Experiment with 5 different ways of presenting paper on canvas. Immerse yourself in a skill-enriching course focused on a process of reaction and inspiration offered by the expression of the materials. Instruction is suited to intermediate and advanced painting skill levels

Interested in finding out some of my paper secrets?

Thursday, April 26, 2012

Live! on Daytime

Tuesday April 24th 2012 at Rogers TV, Barrie

That's me, in the white jacket, demonstrating my entire paper process for the first time ever on live television as a participating artist on the Barrie Spring Art Tour. Nerves? You betcha. But the hosts, Leeann Pendleton and Glenn Coulson were terrific and made it all an enjoyable experience.

I was on set for the entire show, and between interviews with several other guests they would take turns trying out the basics of each of the 3 stages that make up my work.

Wednesday, March 14, 2012

8 Steps to a Seahorse

I am honoured this year to be accepted into the juried Barrie Spring Art Tour. To promote the tour large banners will be hung from the lampposts of downtown Barrie, with each of the tour artists asked to create original works on each banner.

Making a temporary paper worked piece which will live outdoors for over a month would be a particular challenge for me, but as I appreciate that new challenges push boundaries I was eager to accept.

Below are photos of the banner in progress to completion and a bit of info on how I approached this project.


Monday, June 27, 2011

A Trio Of Ravens

As a subject for my paper works, Ravens translate well into a flurry of lines, deep textures and royal metallics; the technique and mediums alluding to their diverse, complicated natures and multifaceted representations in world wide raven folk lore and mythology.
I prefer using black coloured papers when shaping ravens, as used in these three characters: The Diviner, The Enchanter and The Charmer.
The Diviner is a Featured work on my Contemporary Paper Artist website this month.
I'm always interested in stories on ravens in mythology and would appreciate any links or book titles in response.


The Enchanter
Encouraging transformation ...
Original on Gallery Style Canvas
©2011 Col Mitchell
12" x 12" x 1.5 "
Contemporary Paper Art: Manipulated paper, fluid acrylics and inks on canvas
Available www.etsy.com/shop/cedarraven


The Diviner
A symbol of Apollo in his role as god of prophecy ...
Original on Gallery Style Canvas
©2011 Col Mitchell
12" x 12" x 1.5 "
Contemporary Paper Art: Manipulated paper, fluid acrylics and inks on canvas
Available www.etsy.com/shop/cedarraven


The Charmer
Celebrating Odin...
Original on Gallery Style Canvas
©2011 Col Mitchell
12" x 12" x 1.5 "
Contemporary Paper Art: Manipulated paper, fluid acrylics and inks on canvas
Available www.etsy.com/shop/cedarraven


Sunday, August 16, 2009

Worse Than It's Bite Triptych Emerging


The first to finish: Birch


Mother of Invention RESULTS


Well? What do you think?
I think reasonably successful. I also think there is room to play with this two step-2 step approach.
Tentatively titled: First Reflection
Finished it today at the Woods End Experience Show, which was fabulous! The deLangs really know how to put on a show. You would be lucky to get in next year. Everyone wants to return!

Wednesday, August 12, 2009

Mother of Invention and All That Jazz

It started with me staring at a 12in x 36in canvas imagining a river bank scene with mirror like reflections of skeletal white jutting and tangled tree roots adorning a misty shoreline.

So the question was...

How can I get/create a reflection of shoreline and driftwood using manipulated paper? How could I come close even and still keep it true to the paper's own willful fault lines without going to the extreme of breaking the paper down into a pulpy mess for molding? How would I get the loosely applied washes to mirror? I am deliberately trying not to paint the scene, as it defeats the whole process of working with materials allowed to have their own ideas or generous input to the outcome.

Well I think I've got the solution. Oh ya.

Just came back from the studio. It involves a two stage canvas prep and a two stage wash process. First stage of canvas prep completed and drying waiting for stage 2: Apply washes which then goes back to stage 2 of stage 1: canvas prep. 
Following me?
Well...you can come see the demo at the Woodland Art Experience this Weekend!
Aug 15, 16 – Woodland Art ExperienceKilworthy

Col Mitchell


Saturday, August 01, 2009

Plein Air Event raises $3500 for Student Scholarships

I thoroughly enjoyed the day, even though I missed out on wine and stuff due to killing the battery on my car and needing to wait for my friend's son and mom  to come give me a boost! I was only about 15 minutes late for the auction though, so was able to catch most of the grand finale. 
Again, tremendous fun meeting other artists in a more relaxed environment. And it was simply an excellent exercise to stretch and challenge the usual "modus operandi." The buzz and many times voiced enjoyment from the spectators was a great boost. 
I had a lovely spot down by the river in River Mill Park. And I managed to keep to my current technique of paper/wash/line, using tinfoil as an "oven" to speed up the paper layer drying time. Always fun to experiment! 

Letter from the organizer:

Hi everyone.

I just wanted to send a huge thank you to everyone for making the first annul en plein air a huge success.  It is now obvious this event will run annually, and I'm certain it will grow into a grand event down the road.  One day I hope to see as many as 100 artists and perhaps even figure how it can become an event where the main street of huntsville is actually closed and get some performing art happening as well as the painting.  Time will tell.

Regardless, this could not have been such a success without each and every one of you.  I thank you for producing such fabulous work and offering a full day out of your busy lives.

At the end of the day we managed to raise about $3500.  This translates to over $1000 for three students continuing their education in the arts  from each of our communities (huntsville, bracebridge and gravenhurst).

Thanks once again,
kelly

--  kelly holinshead the shutterbug gallery shutterbug photography  34 main street east huntsville, ontario 705-788-7392  www.kellytheshutterbug.ca


Tuesday, July 14, 2009

Trying Something New!


This is not something I have experience with, but am thinking it should be a fun day so I am going for it!

Thursday, July 09, 2009

The Latest Piece


Just finished this one today! Another manipulated paper piece titled "Red Heads."
This is 2ft by 5ft on gallery canvas (1.5 inch deep)

Thursday, July 02, 2009

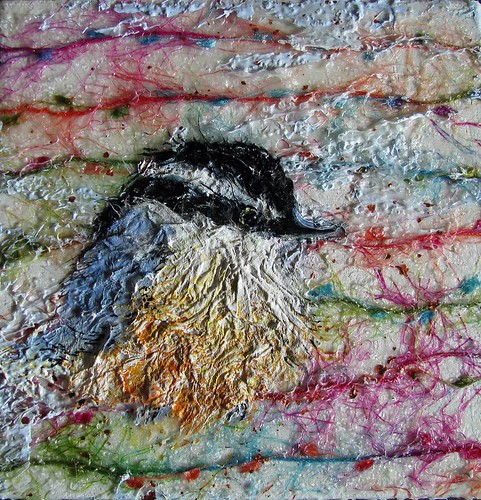
Nuthatch Candy!


Three for the sweet toothed bird watcher! See them at Art in The Heart July 11th and 12th! Downtown Bracebridge.

Wednesday, June 17, 2009

Heroes and Villains


2009June17-Villains&HeroesHL
Originally uploaded by ravonCol

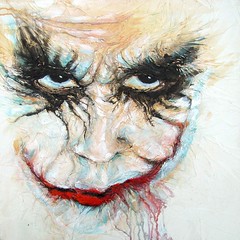
I just HAD to do something for the Heroes and Villains themed exhibition at 6Degrees Muskoka, and Heath Ledger's Joker suits my technique to a T.

This painting is 2ft x 2ft x 1.5 in deep

Fluid acrylics & manipulated paper on canvas.

Tuesday, April 21, 2009

Latest Work

In honour of my aunt RA, my Mom, my husband's Mom, and my 2nd cousin:


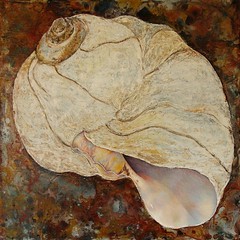
She Cell C Shell
24" x 24"

Monday, April 06, 2009

Sculpted Paper Technique: Origins


Since 2008 I have told the story of the Sculpted Paper Technique countless times. It occurred to me recently, that the only way anyone has been able to hear this story is if they had met me personally. Well, that definitely leaves a lot of people out of the loop.

So this blog tale is for those who have only seen my art online, or who have happened upon my work at a gallery or show where I am not present.

Here is the first work I did in this technique:

When Seasons Meet © Col Mitchell   8" x 10"  (photo credit Ellen Fox)

And here is the story behind this work:

I attended a workshop early 2008 (Jan or Feb) led by Artist Donna Buchan. This workshop involved a demonstration by Buchan on soaking a sheet of light weight watercolour paper that was larger in size than the canvas support it would be applied to. After applying gel medium to the canvas board,  Buchan first bunched up the paper into a ball, then spread it out over the canvas board, matching up the edges of the now malleable wet paper with the edges of the canvas, leaving a surfeit of paper to "play with" in the center.There were 12 or 15 of us in that class, each of us came away with something different.

When it was the class' turn to try our hand at what she had demonstrated I already knew I was going to try to shape a tree. It was while Buchan was bunching up the wet paper that I noticed the quality and character of the crumple lines; and I thought to myself those lines would make a great tree.

When Seasons Meet is made from one sheet of artist quality construction paper (white) larger than the canvas: wetted, crumpled. spread onto a gelled surface, and pinched, pushed, maniplutated and sculpted into a trunk with branches and a bit of ground texture. Tissue paper (white) was carefully applied on top to add variety and a different quality of line: more fine and sharp.

The story doesn't end there, however. Most went on to paint their new works during the class. I opted instead to take mine home and let it dry completely. I could see the lovely tree shape made from the paper: the interesting surface lines of creases, the surface quality of the two papers. And I had no idea what to do with it. It was beautiful and I was not all that confident I would not wreck it somehow by painting over it with acrylics.

Fortunately, just the week previously I was in the artist supply store browsing all the toys, when I spotted acrylic inks. I had no idea inks came in acrylic form, and I found the discovery appealing enough to purchase the 3 primary colours, plus black, white, and a pen-nib. It was the quality of ink (super thin) that made it a perfect choice in my mind to apply to the paper tree. You see, I was afraid any other paint would obliterate the finer lines. I had a spray bottle of water standing by in case it all went horribly wrong.

Proceeding with caution, I first misted the entire surface with water. Then I used the droppers in the bottle to drip the ink. The result was dazzling! The ink spread like fireworks, traveled, hugged crevasses  thinned and paled with absorption; the two types of paper each affecting the travel and staining intensities differently. I repeated many applications of thinned ink; impatiently drying with a blow-dryer between each layer, or encouraging  colour blending, creating even more surface interest. 

It was all lovely, soft, delicate and . . . blurred. Unfortunately, not my preference. I still felt I could take the piece further. It needed some definition. So, I pulled out the pen-nib and went in adding even more lines, highlighting and defining preferred lines, increasing depth, upping the light, and finishing the work as you see it here.

When Seasons Meet © Col Mitchell 8" x 10" (photo credit Ellen Fox)

And that is the origin of the Sculpted Paper Technique. I make every attempt to stay true to this three-step process in the works that follow: sculpted paper, layered acrylic washes, multi-hued pen-nib applied ink lines.


Thursday, February 26, 2009

Just what HAVE I been up to?

I'll have to make a list one of these days, but suffice it to say enough to keep me from working as much as I would like to.

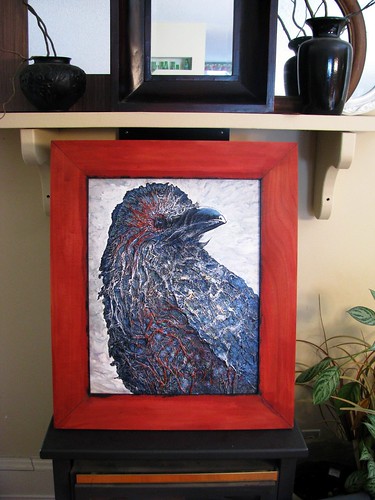
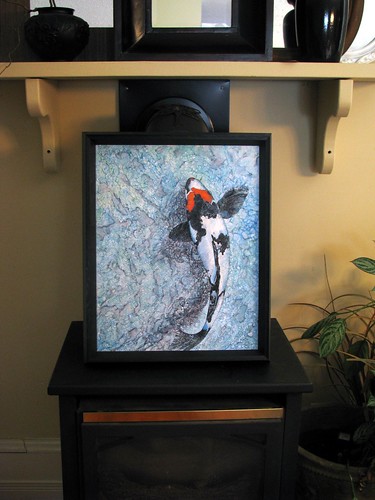
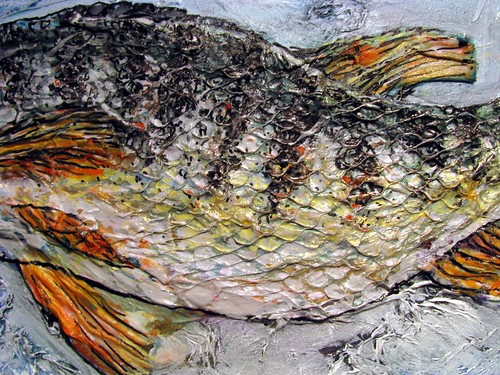
I did get something accomplished with my art in the past two days. For one, my income tax! *whew* For another, I made two frames. A new frame for the Raven's Mirror and a frame for a new piece titled Autumn Kaleidoscope. And I took the frame intended for the Raven (but which I decided wasn't working as best it could) and gave it to the koi.


Tuesday, February 03, 2009

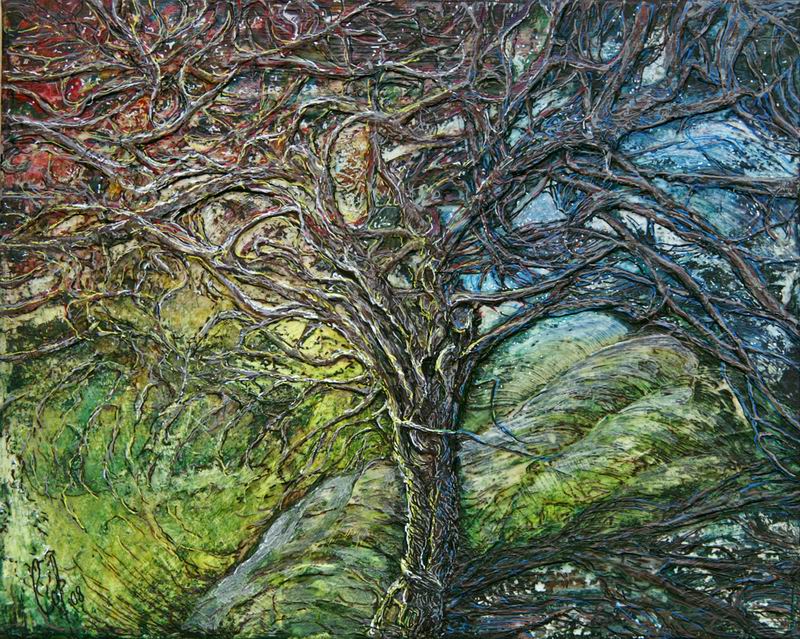
Trunk Series


2009trunk
Originally uploaded by ravonCol

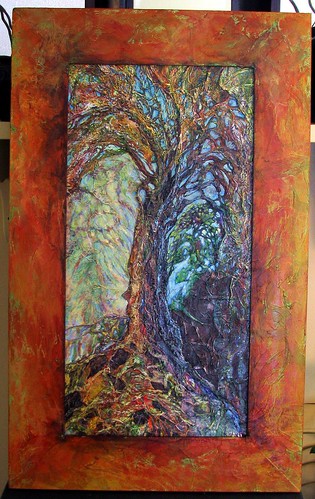
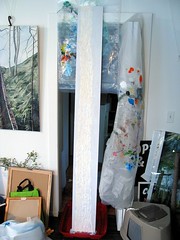
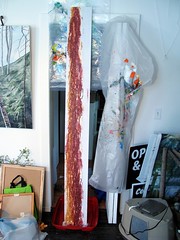
For lack of a better name. This is a smaller trunk from the 7 foot one still in the works.
The Rescue


2009BirchInRain
Originally uploaded by ravonCol

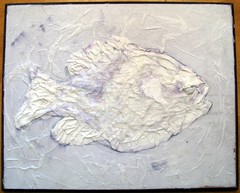
I came this close "> < " to tossing this canvas. If I didn't absolutely abhorr wasting canvas I just might have done it. Nice to know if I stick with it I just might turn it around.
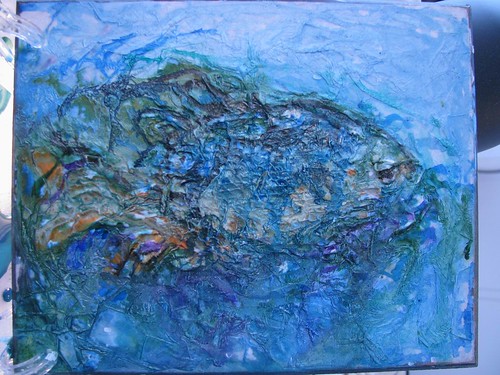
Sherry (sethurner) your blues have been on my mind lately, especially with this one.

Thursday, January 01, 2009

I spent the holidays working away on an assortment of sizes and trying out a couple new subjects with the manipulated paper technique. And I even managed to take some photos of the process so I thought this would be a good opportunity to share the basics of what is involved with each piece of work using this technique.

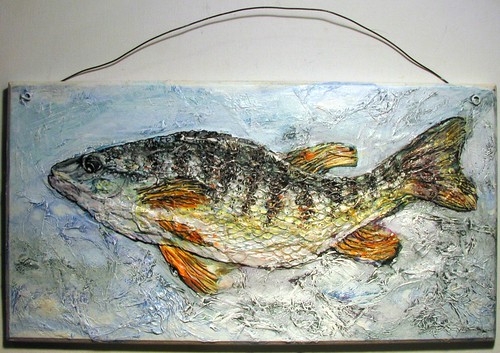
PERCH

Step 1

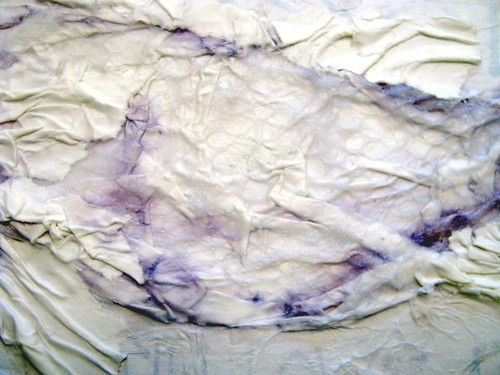
Preparing the canvas with selected papers; wetting manipulating, tearing, and layering with various gel mediums, letting harden into its own unique surface.


Step 2

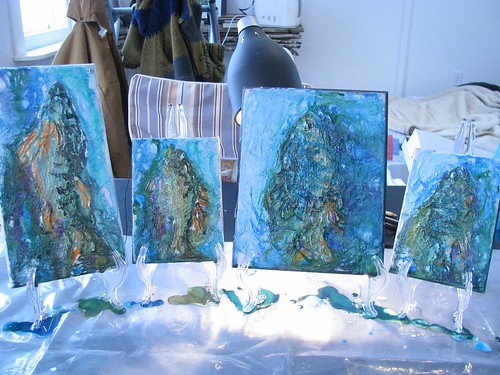
Applying sprays and pools of thin washes generously and excessively, allowing the variety of colours to randomly explore the many pathways suggested by the papers' textures.

Notice the paint pooling on the table?


Step 3

Further exploring the texture and shape of the image, line by line, with pen nib and acrylics, until all 3 steps merge as one, creating the final fused cohesive image.


Other works in varying stages of the process: