

 I am honoured this year to be accepted into the juried Barrie Spring Art Tour. To promote the tour large banners will be hung from the lampposts of downtown Barrie, with each of the tour artists asked to create original works on each banner.
Making a temporary paper worked piece which will live outdoors for over a month would be a particular challenge for me, but as I appreciate that new challenges push boundaries I was eager to accept.
Below are photos of the banner in progress to completion and a bit of info on how I approached this project.
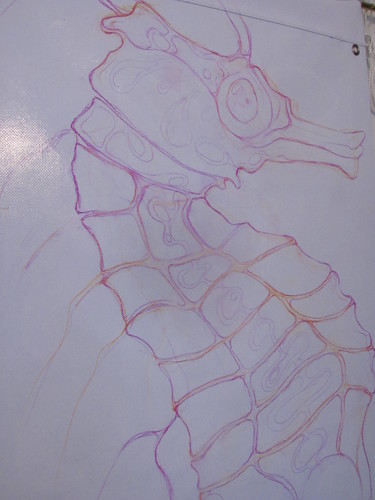
STEP ONE
I've always wanted to do a seahorse and I figure this is a good opportunity. The single subject works for distance viewing and I think it will feel at home swaying in the "big blue."
I am assuming the banners are vinyl, and as vinyl is somewhat porous I gave it two coats of GAC 100 to boost waterproof properties, plus increase the bonding of the gelled paper to the banner surface. Then I drew on the seahorse with pastel pencils, and brushed over the lines lightly again with more GAC 100 to keep the pastels lines from erasing during the papering process.
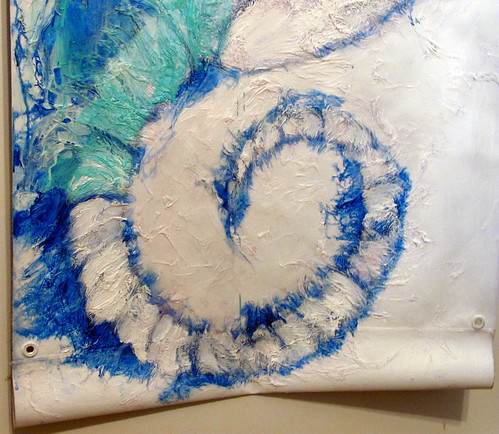
STEP TWO
I used a waxed tissue for the paper, hoping to increase the waterproofing and by use of a thin paper increase saturation of the gel. Once dry, I added a thin coat of Golden`s gesso, further increasing waterproofing.

STEP THREE
I used a thalo blue wash and let it explore the paper texture, layering with a cobalt teal and both zinc and titanium white. Although I lost some of the details by gessoing, I used a photo I took of my original drawing on the banner for reference.
I used a thalo blue wash and let it explore the paper texture, layering with a cobalt teal and both zinc and titanium white. Although I lost some of the details by gessoing, I used a photo I took of my original drawing on the banner for reference.
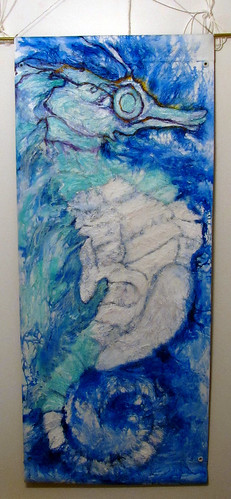
STEP FOUR
Now I'm playing with a couple other colours (Dioxine Purple, Indian Yellow, Pyrol Orange, and Ultramine blue) to determine how I want to build the form.
Now I'm playing with a couple other colours (Dioxine Purple, Indian Yellow, Pyrol Orange, and Ultramine blue) to determine how I want to build the form.

STEP FIVE
I've decided on my colours and work begins to complete all the washes.
I've decided on my colours and work begins to complete all the washes.
STEP SIX
The major lines are in, and the top layering of cobalt teal/white continues.

STEP SEVEN
Heading toward the final line work, I start adding in my other colours.
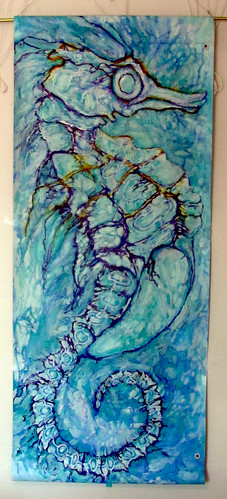
STEP EIGHT
This is the completed banner. I have limited the line work to black only (as this is a temporary piece and the line work stage is very time consuming). A coat of gloss gel over all for, again, additional waterproofing. The banner is now hanging for some cure time and I will then finish with several light coats of Krylon protective spray (as recommended by the tour organizers).
Fingers crossed this water baby spends many "deterioration free" weeks!
Fingers crossed this water baby spends many "deterioration free" weeks!

See you on the tour! I will be at
172 Blake Street, Barrie
My studio host is Contemporary Master Landscapist Yvette Miller
Saturday April 28 and Sunday April 29, 10:00 a.m. to 4:00 p.m
Please Join me at the Opening Reception Friday, April 27:
Creative Space, 12 Dunlop St. E. Barrie, Ontario
7:00 P.M – 10 P.M
View works from the other fabulous tour artists http://barriespringarttour.ca/artists.html

Awesome banner Col! I love the process steps :)
ReplyDeleteThanks Mandy! I want to do a small one too...just brought home a 24 x 12 canvas... so we'll see... :)
ReplyDelete